LOCALIZE PRESSURE ANTINODES OF THE TONES
This is a relatively simple procedure. You select for the desired tone in the “Commander Bridge” the corresponding valve position that contains the tone, click on the “Assistant” button and all tones are displayed with their intonation data.

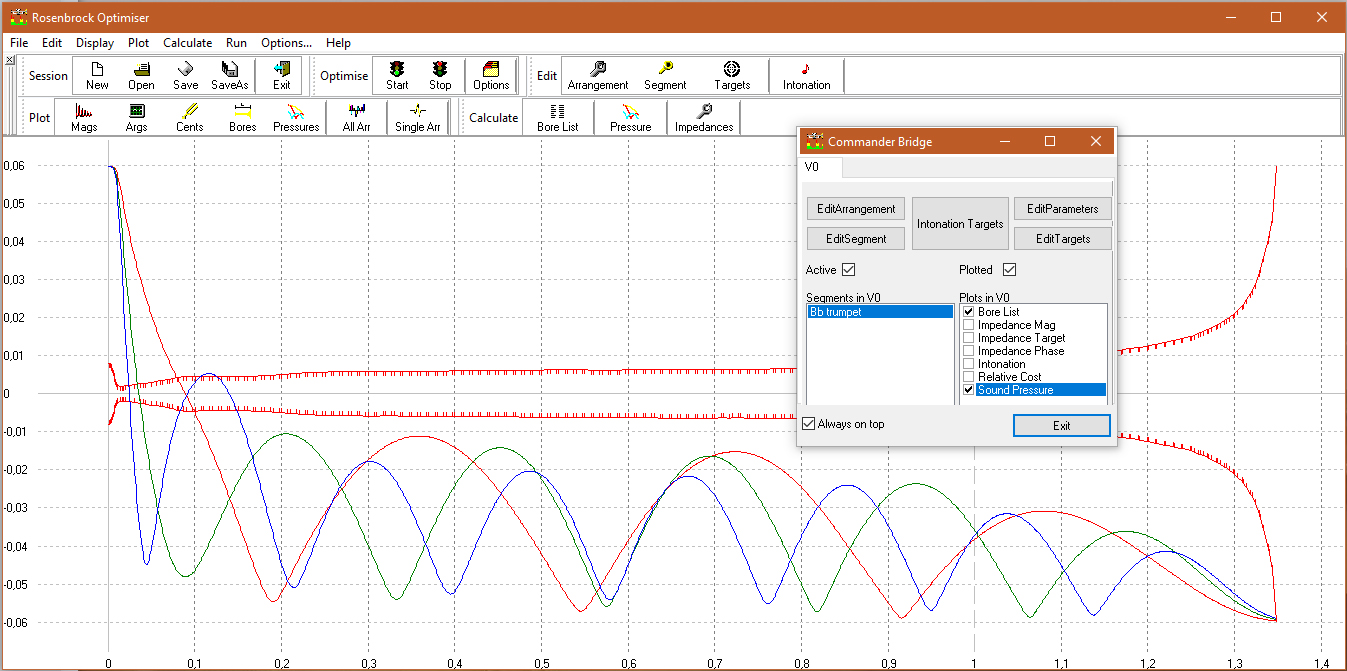
For example, select 3 tones from these naturals possible with this valve combination (in the illustration these are the 4th, 6th and 8th naturals) by simply deleting the rest from the list. Click on “Calculate Pressure Curves” in the menu in the main screen and then on “View Pressure Curves” Done! As seen in the Commander Bridge, the impedance, intonation and other parameters could also be displayed.

Red: 4th natural (Bb4), green: 6th natural (f5), blue: 8th natural (Bb5). X-axis in meters.
USEFUL TOOLS
Wilfried Kausel, whose idea the optimizer was and who also programmed the software, endeavored to reproduce as many mechanical processing steps as possible to be carried out in reality using mathematical functions.
The Smoothing Tool
In an effort to implement the specifications in the best possible way, the optimizer sometimes proposes bore changes, such as abrupt, minor widenings or narrowings of only 2 to 3 mm in length. Such “ripples” are of course undesirable. Therefore, you click on the smoothing tool and irregularities in the bore are eliminated.
The Bell Design Tool
is an extremely practical tool for new designs. With only one code number you can try out all common bell shapes up to extreme shapes and choose the most suitable one for your instrument without actually having to build it.
The Sleeve Tool
is also an enormous time-saving tool. It simulates a sleeve of any length and wall thickness inserted at any point. With 3 clicks of the mouse, you have inserted a sleeve into the bore of a component and can use it to determine its effect on intonation and response. If it is only about the intonation of 2-3 single notes, the manual use of this tool is the fastest and easiest method.
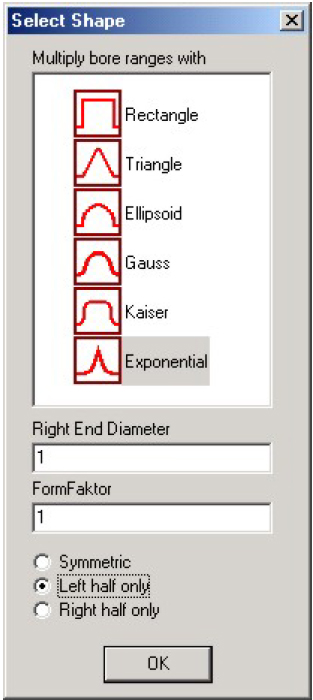
The Shaping Tool
This allows you to select tool shapes with the help of which you can give the parts any reproducible shapes.
These are just a few examples of the tools built into the optimizer.

You can stop a running optimization at any time, save the intermediate status and then continue optimizing.

During an optimization you can see in real time at which points of the instrument the optimizer changes something and at the same time how these changes affect e.g. the intonation and response.

You can intervene at any time during the optimization and change the focus or set new priorities. If, for example, the correction of certain notes is more important to you than that of the other notes, or the envelope, i.e. the response is more important, then simply increase the “weighting” (this is a number) for the corresponding property – without interrupting the optimization.

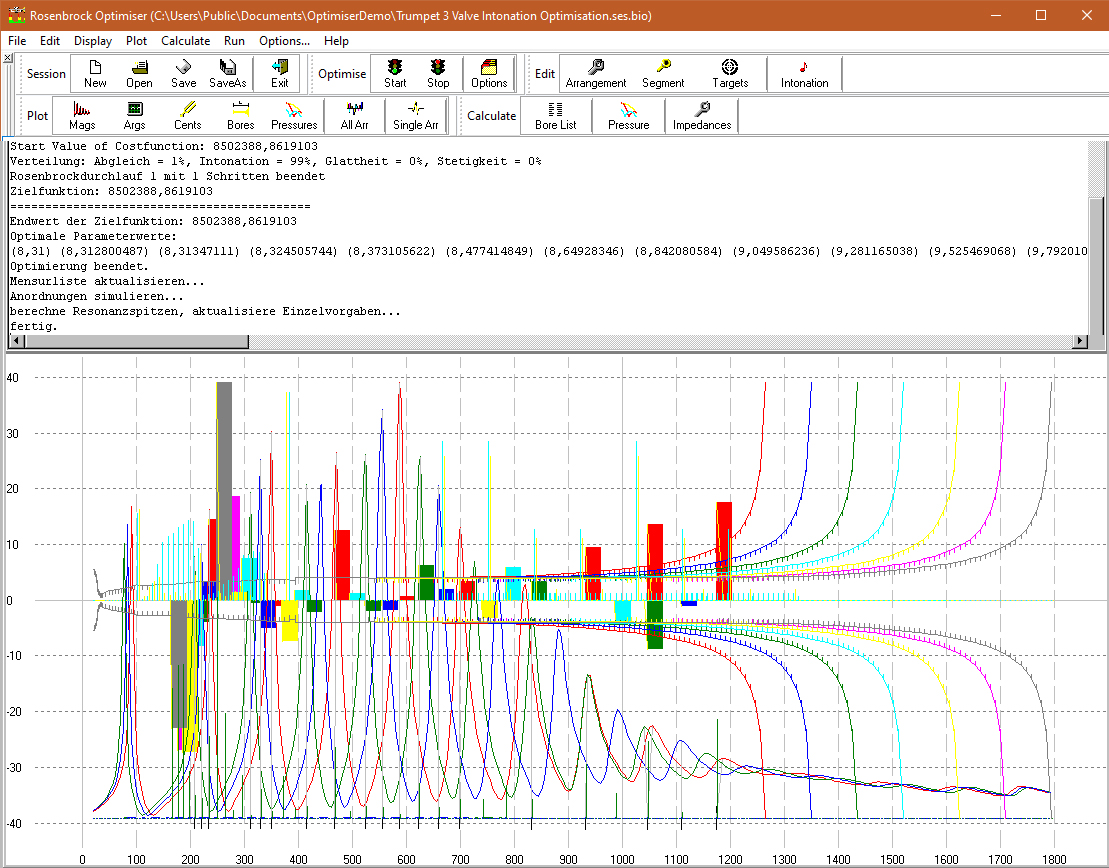
Figure: The main screen during optimization of a Bb trumpet. You can see the bore, and the impedance curves of the different valve combinations. The colored bars show the current intonation deviation of the selected tones. Some tones can be produced with different valve combinations, so there is an upward and downward deviation at the same time. The valve combinations are color coded.

MATCHING AND CLONING

“Matching” is a very handy function: for example, you give the optimizer a bore list of any trumpet, then click on the “Single Presets” button in the Commander Bridge and load a measured impedance curve of another trumpet as the “matching target”.

When the optimization process is started, the optimizer calculates the impedance curve of the bore list given to it and tries to change the impedance curve belonging to this bore list so that it corresponds exactly to the curve loaded as the “Matching target”. To do this, it must modify its original bore list so that its impedance curve precisely matches the curve specified as the target. After completion of a successful optimization process, you will receive the bore list of the measured instrument and thus the exact construction instructions for a “clone” of this instrument.

However, this is a task for advanced users, since it is often necessary to modify various individual attributes and weightings during the optimization process.

Furthermore, for mathematical reasons, the complicated geometry of the mouthpiece at the very beginning of the instrument makes it difficult to match the two curves exactly. It is more convenient to perform a measurement of the instrument to be cloned without the mouthpiece and to omit the mouthpiece from the bore list as well.

However, the matching function is very suitable and is therefore recommended if you want to optimize an instrument, but your bore list is only inaccurate. In this case, the “Matchíng” of your bore list with the measured impedance curve is useful to get better results when optimizing.

Since optimization always involves changes to the bore lists, it is important to save the starting position right at the beginning and the current situation as a “session” at sensible intervals in between. This allows you to return to the starting position or several steps at any time without losing valuable data.